In this step-by-step guide, we will explore how to set up Keycloak for app-to-app authentication.
Project
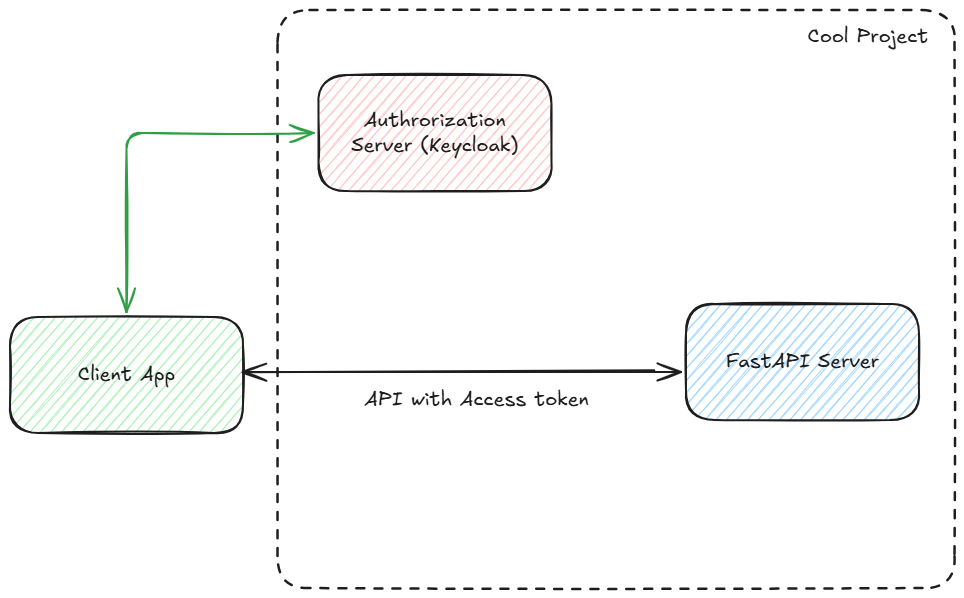
In this demo, we are going to create a project named “Cool Project” . It has a FastAPI-based API server and client app. For app-to-app authentication/authorization, we will use the OAuth2 client credentials flow.
OAuth 2.0 Client Credentials Flow Specification – RFC 6749
The components of our project are :
- Resource server – FastAPI server
- Client – Client app ( For the simplicity of this demo, we will use Postman to call the APIs).
- Authorization Server – Keycloak
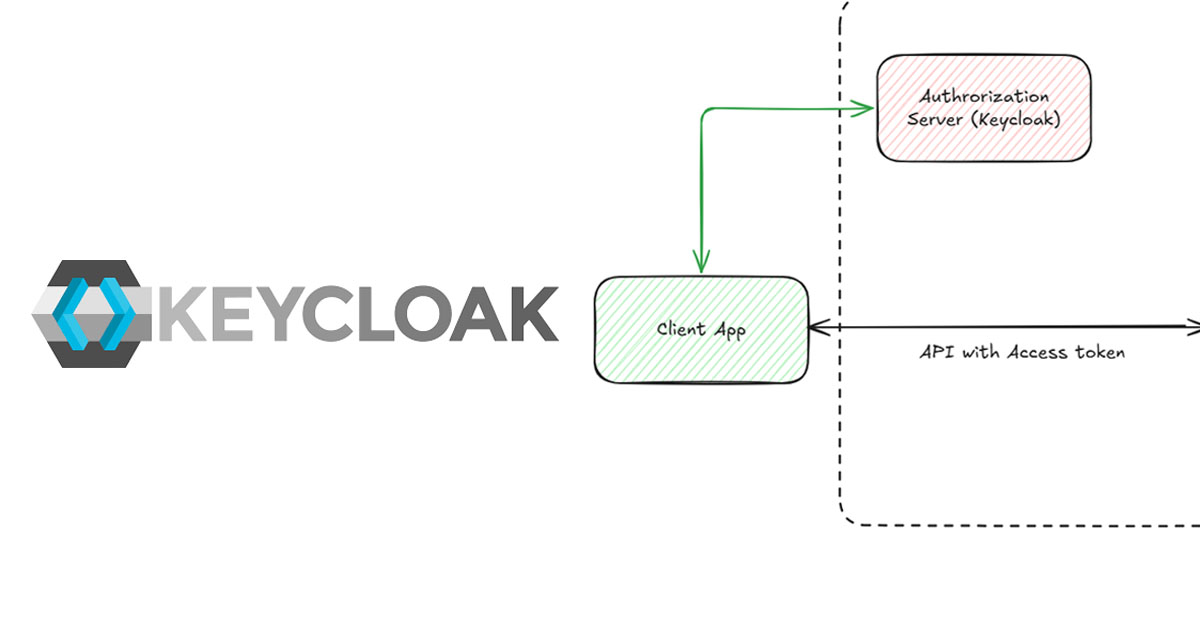
We will use the client ID and client secret of the client app to get an access token from the Keycloak authorization server. We will use this access token to call the FastAPI server APIs.
Keycloak
Keycloak is an open-source identity and access management solution that provides single sign-on (SSO), authentication, and authorization for web and mobile applications. It supports modern security protocols like OAuth2 and OpenID Connect, integrates with LDAP and social logins, and offers centralized user management and customization. Keycloak supports the OAuth2 Client Credentials flow, which can be used for app-to-app authentication and authorization.
Start Keycloak
First, we need to download Keycloak.
Download the Keycloak zip file from here and extract the zip file. We are using Keycloak version 26.3.
After extracting the zip, enter the keycloak directory and run the following command in the command prompt:
bin\kc.bat start-devPlease note that we are running Keycloak in development mode. Open the URL http://localhost:8080/ in a browser. For this demo, we’re going to create an admin user.
Create an admin user with a username admin and password as adminpass Then log in to Keycloak using the admin user.
Create a realm for the project
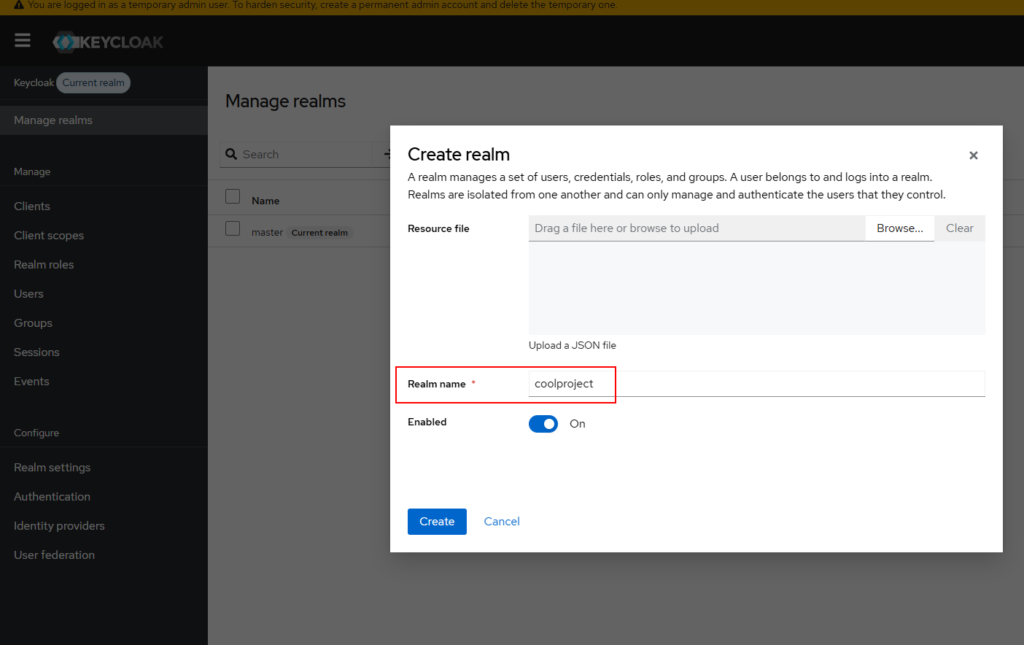
Next, we need to create a realm for our project. A realm in Keycloak is an isolated security and administrative domain where you manage users, applications, roles, and groups. In simple terms, we can think of it as a project with all the details.. Each realm controls authentication and authorization for its contained resources, ensuring that users and configurations are separated from other realms, enabling multi-tenancy and organized management.
Let’s create a cool project realm. Click on “Manage realms” on the left sidebar and create a realm as shown below.
Create client
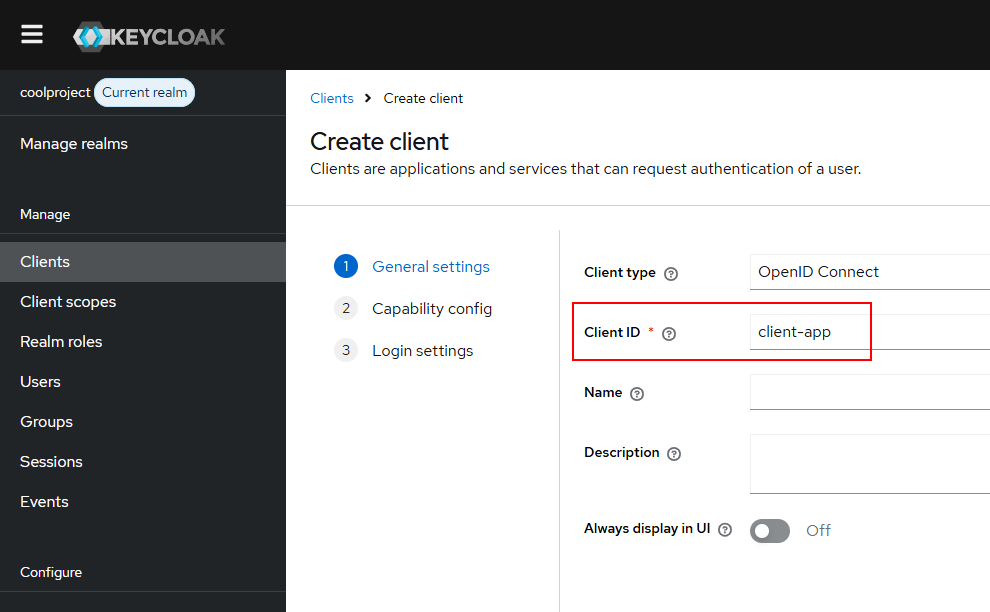
Next, we need to create a client in the coolproject realm.
Click next, and on the next page, we need to turn on “Client authentication” and “Service account roles” as shown below :
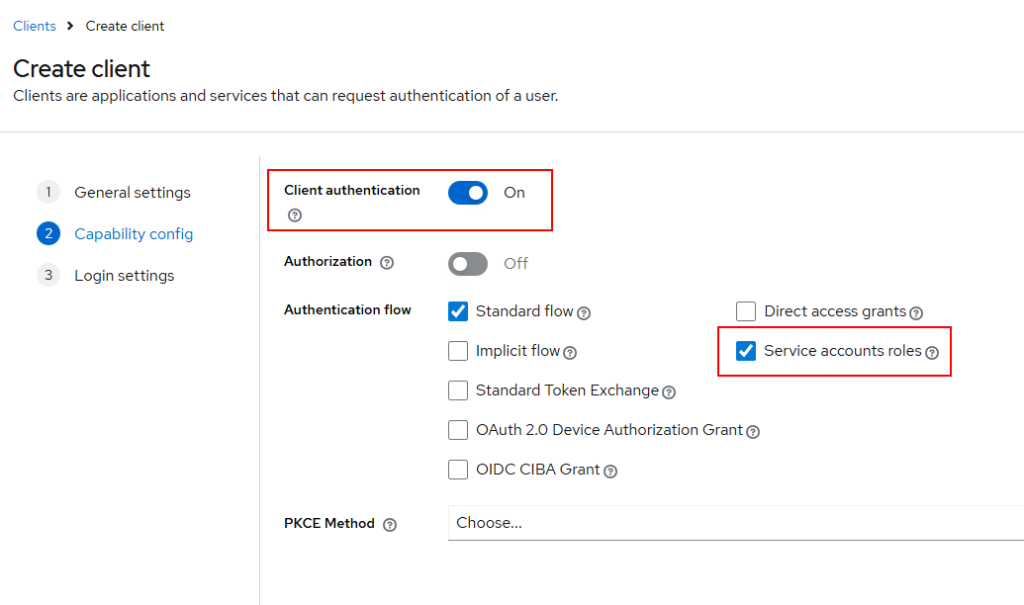
The above settings enable us to use the OAuth2 client credentials flow.
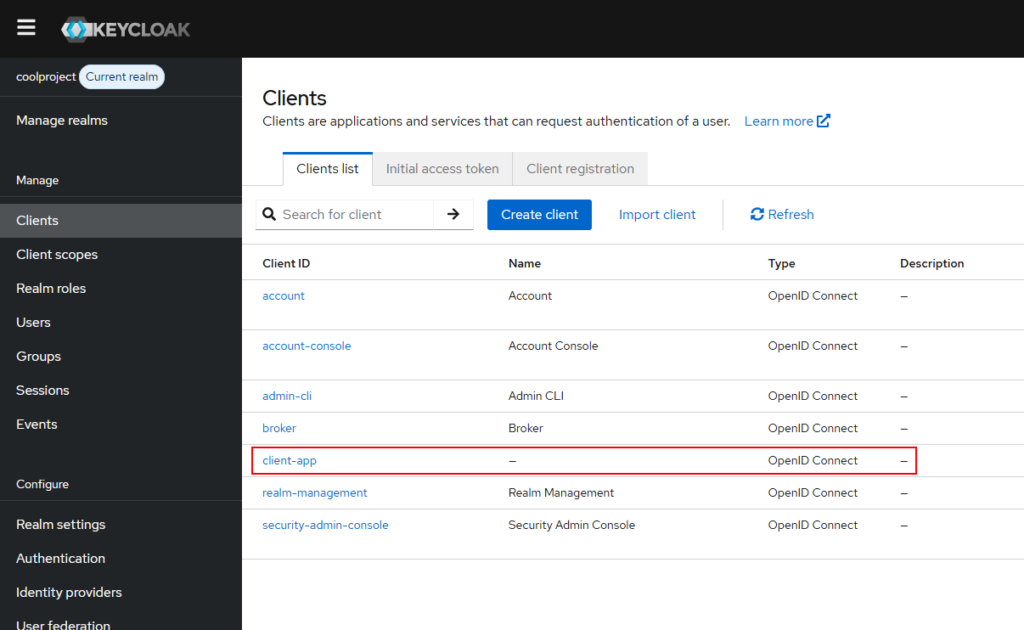
Click next and leave everything as it is, and click save. Now, click on clients again on the left sidebar, as we can see the newly created client “client-app” listed as shown below :
Client ID and Client Secret
In the OAuth2 Client credentials flow, we need the client ID and client secret.
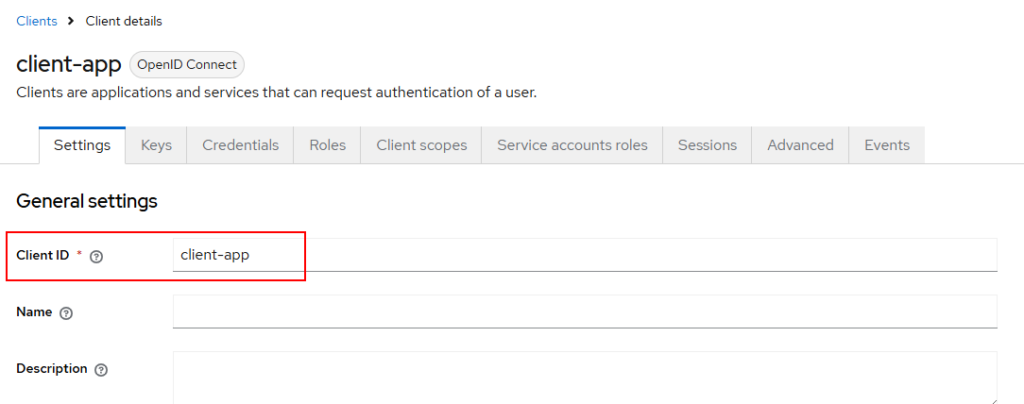
Open the client-app from the left sidebar and we can see that Client ID is “client-app” as shown below :
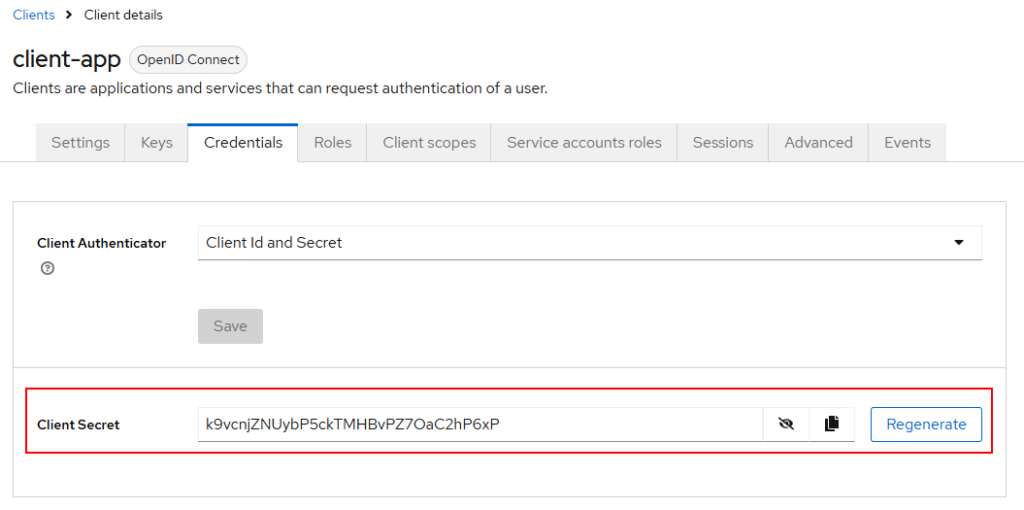
Next, we need the client secret. Click the credentials tab.
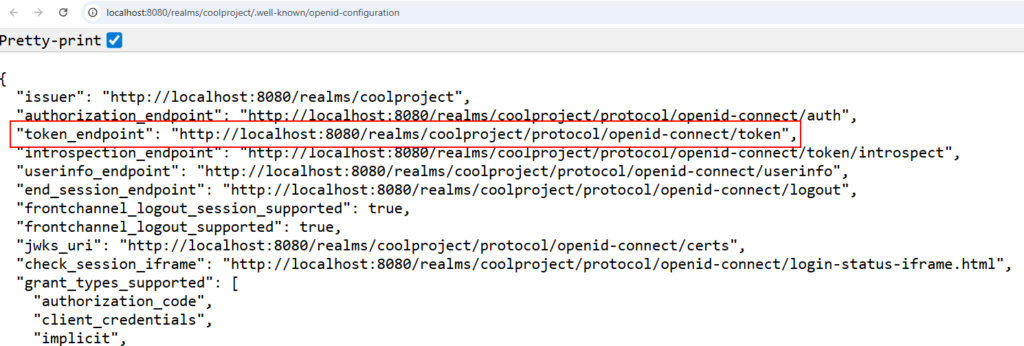
Open the http://localhost:8080/realms/coolproject/.well-known/openid-configuration in a browser. We can see the token endpoint as shown below. We will use this URL in Postman to get an access token for the client app.
Add audience claim
In the Client Credentials flow, there is no user; it’s an application-to-application (machine-to-machine) authentication. The audience (aud) claim in the access token typically refers to the resource server, that is, the application or API that will receive and validate the token.
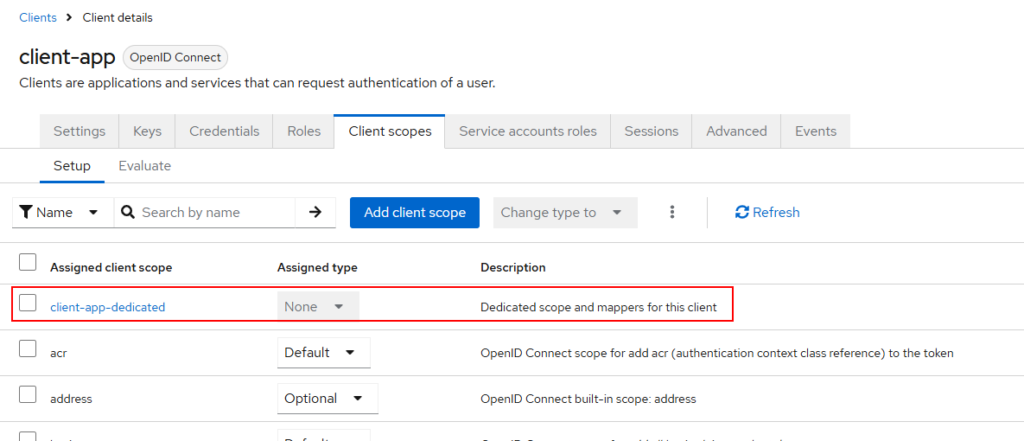
We need to add the audience claim to the access token payload. Open clients, then client scopes, and click one client-app-dedicated (a client scope that is ending dedicated).
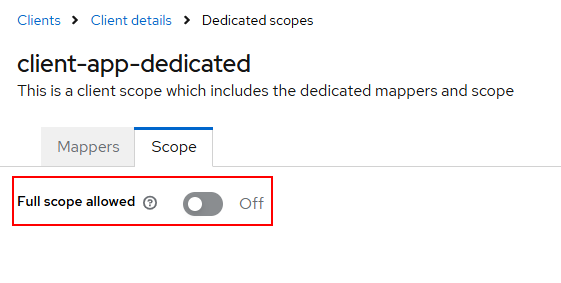
Then turn off “Full scope allowed” (It will remove the default audience “account” ) as shown below.
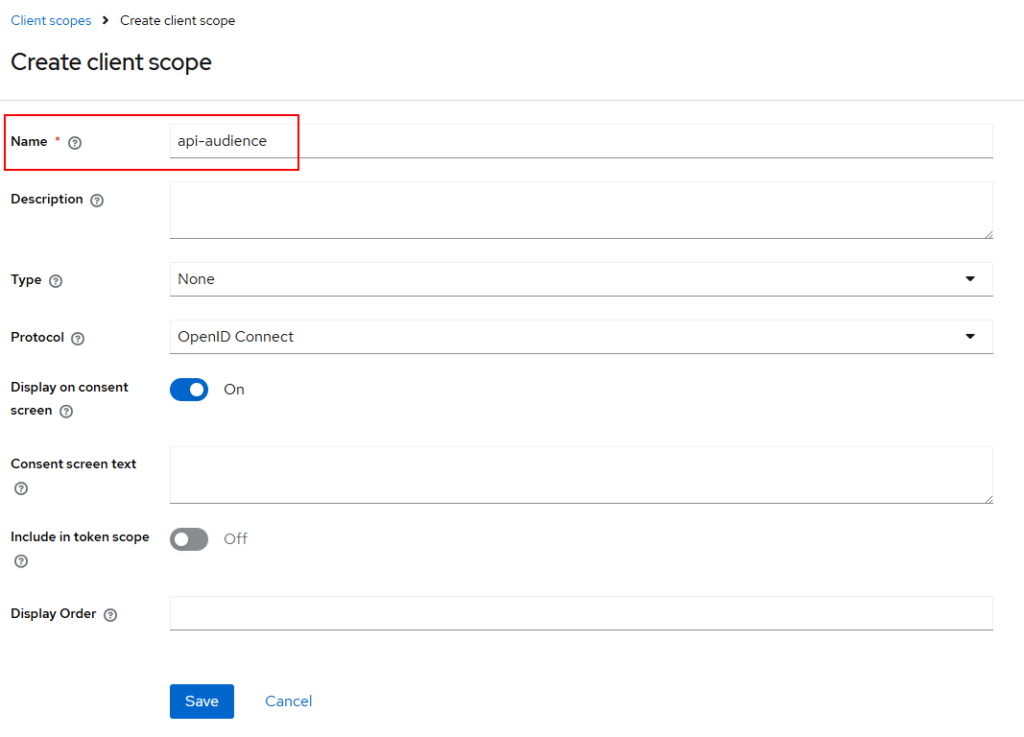
Next, we will create a new client scope for the audience with value as the resource server name.
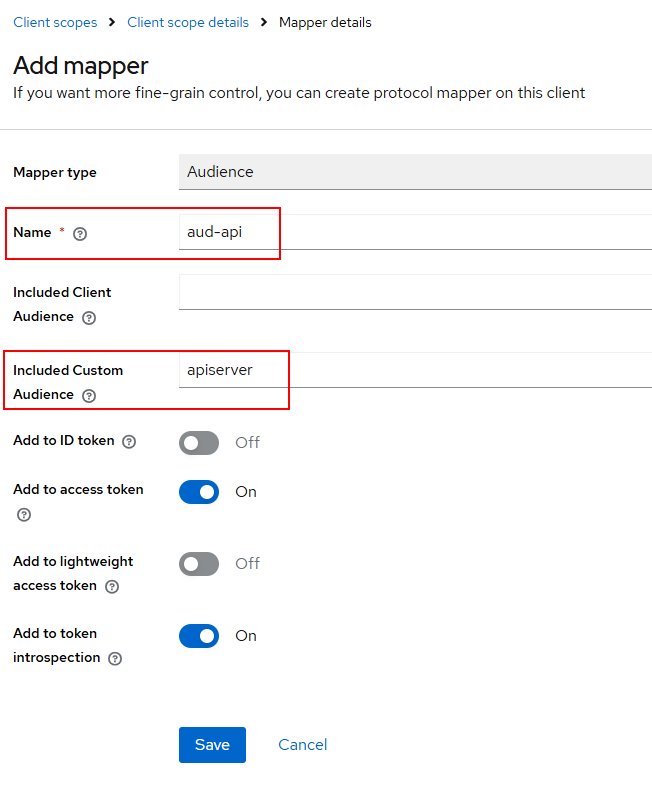
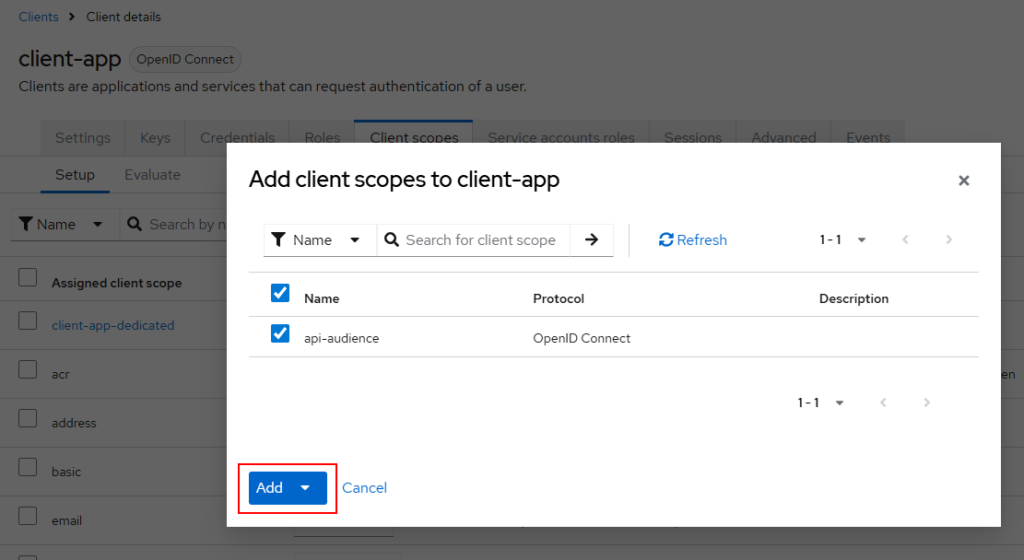
Next, open the client and add the newly created “api-audience” scope to the client-app. Open clients and client scopes, add api-audience as shown below:
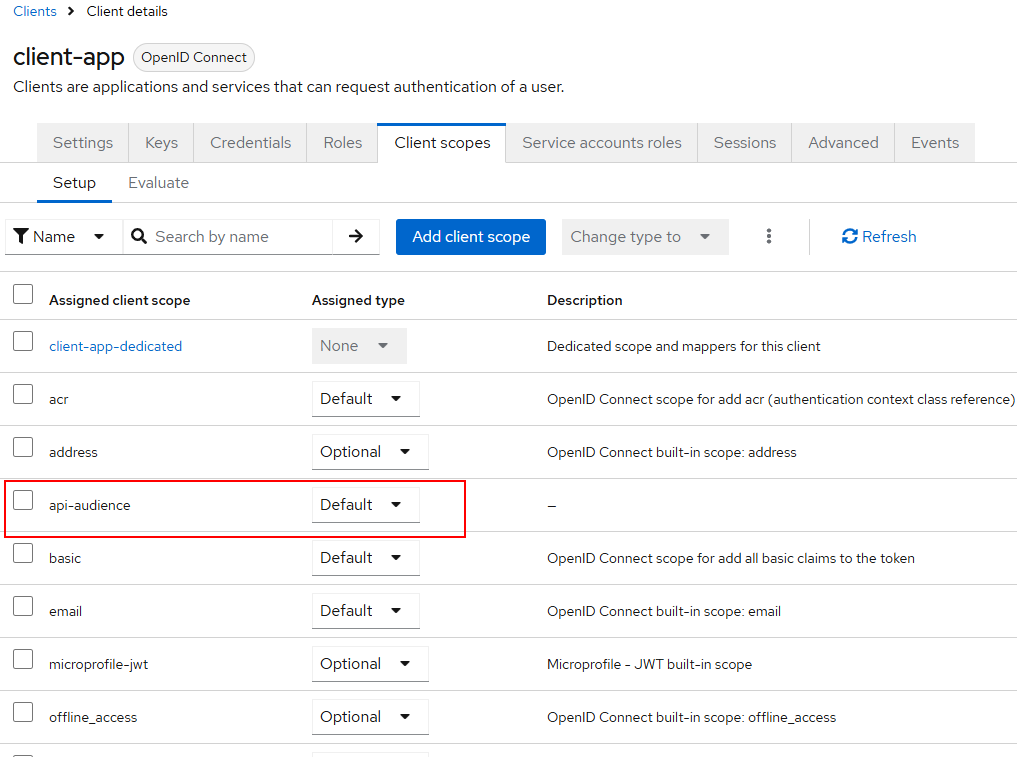
Ensure that api-audience assigned type is “Default” as shown below.
Now our client app configuration is ready.
Start Resource Server
Next, we need to start the resource server. In this example, we are going to use a simple FastAPI application.
from fastapi import FastAPI, Depends, HTTPException
from fastapi.security import HTTPBearer, HTTPAuthorizationCredentials
from jose import jwt
import httpx

app = FastAPI()
security = HTTPBearer()


KEYCLOAK_REALM = "coolproject"
KEYCLOAK_URL = "http://localhost:8080"
KEYCLOAK_OPENID_CONFIG = (
    f"{KEYCLOAK_URL}/realms/{KEYCLOAK_REALM}/.well-known/openid-configuration"
)

JWKS = None
from jose.utils import base64url_decode
from cryptography.hazmat.primitives.asymmetric import rsa
from cryptography.hazmat.backends import default_backend


async def verify_token(credentials: HTTPAuthorizationCredentials = Depends(security)):
    token = credentials.credentials
    jwks = await get_public_key()

    try:
        unverified_header = jwt.get_unverified_header(token)
        kid = unverified_header.get("kid")
        if not kid:
            raise Exception("Missing 'kid' in token header")

        key = next(k for k in jwks["keys"] if k["kid"] == kid)

        n = int.from_bytes(base64url_decode(key["n"].encode()), byteorder="big")
        e = int.from_bytes(base64url_decode(key["e"].encode()), byteorder="big")

        public_key = rsa.RSAPublicNumbers(e, n).public_key(default_backend())

        payload = jwt.decode(
            token,
            key=public_key,
            algorithms=["RS256"],
            audience="apiserver",
            issuer=f"{KEYCLOAK_URL}/realms/{KEYCLOAK_REALM}",
        )
        print(payload)
        return payload

    except Exception as e:
        raise HTTPException(status_code=401, detail=f"Invalid token: {str(e)}")


async def get_public_key():
    global JWKS
    if JWKS is None:
        async with httpx.AsyncClient() as client:
            r = await client.get(KEYCLOAK_OPENID_CONFIG)
            jwks_uri = r.json()["jwks_uri"]
            r2 = await client.get(jwks_uri)
            JWKS = r2.json()
    return JWKS


@app.get("/secure-data")
async def secure_data(user=Depends(verify_token)):
    return {"message": "You have access!", "client": user["sub"]}


if __name__ == "__main__":
    import uvicorn

    uvicorn.run("app:app", host="127.0.0.1", port=8000, reload=True)
Create a requirements.txt and install it
fastapi
httpx
python-jose[cryptography]
uvicorn
In the JWT decode, we need to give the audience as the “apiserver” that we configured
payload = jwt.decode(
            token,
            key=public_key,
            algorithms=["RS256"],
            audience="apiserver",
            issuer=f"{KEYCLOAK_URL}/realms/{KEYCLOAK_REALM}",
        )
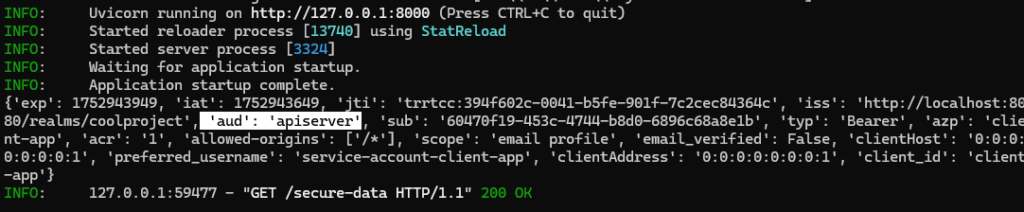
Start the FastAPI server. Next, we will get an access token using the /token request as shown below :
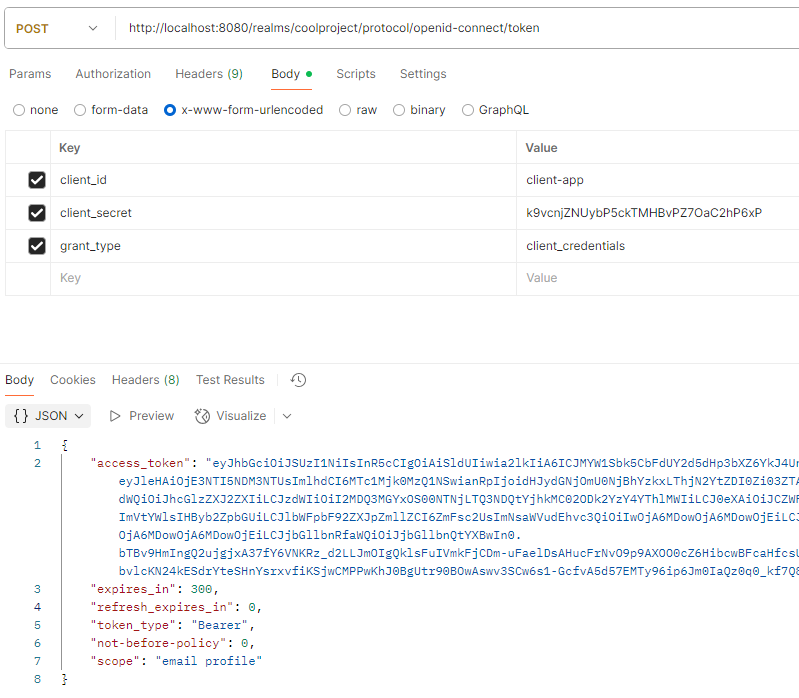
Finally, we will use this access token to call the APIs as shown below :

We can see that the access token payload contains the “aud” claim.
Conclusion
In conclusion, it is easier to set up an authorization server using client credential flow in Keycloak. You can read about How to serve LLM using the OpenVINO Model Server on Windows.